.jpg)
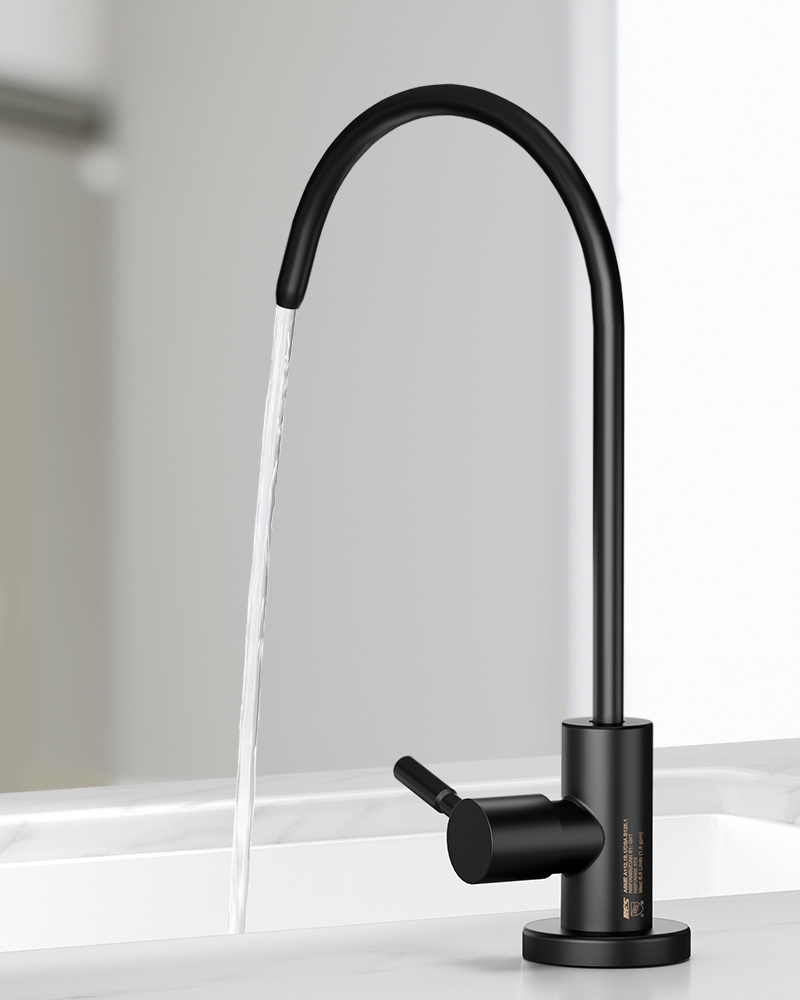
Why Every First-Time Parent Needs a Drinking Faucet ?
/*! elementor - v3.22.0 - 26-06-2024 */
.elementor-heading-title{padding:0;margin:0;line-height:1}.elementor-widget-heading .elementor-...
| Cause | Remedy |
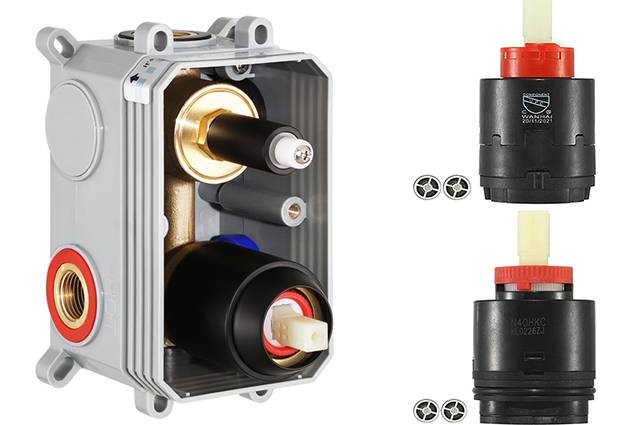
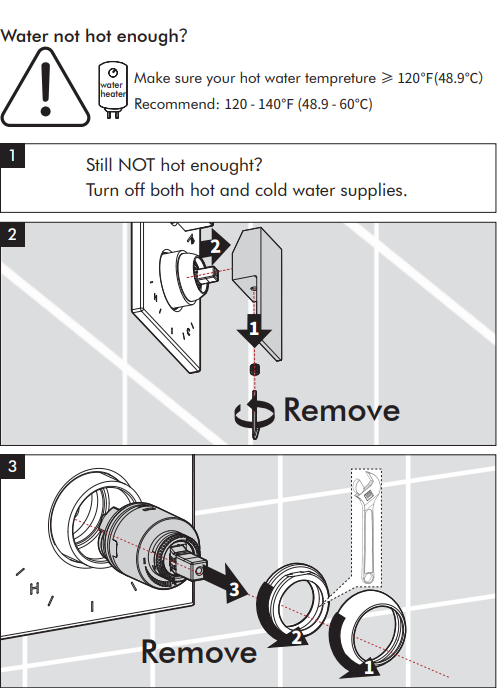
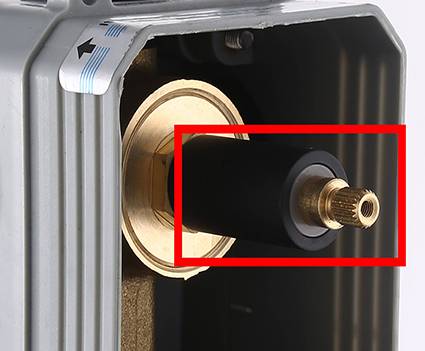
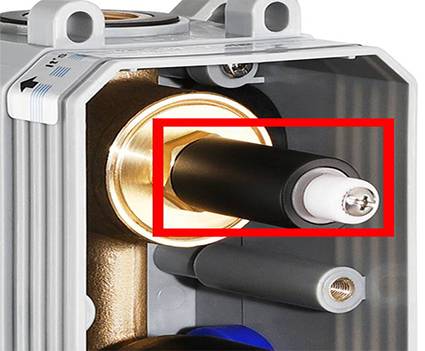
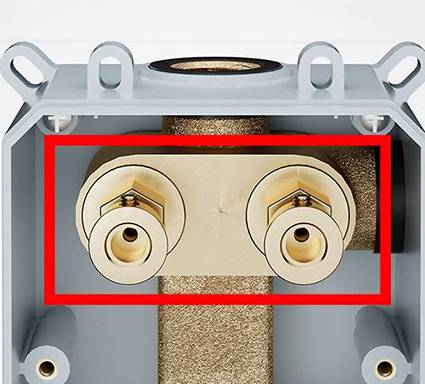
| Incorrect cartridge installation | Align cartridge bottom with main body, then reinstall it |
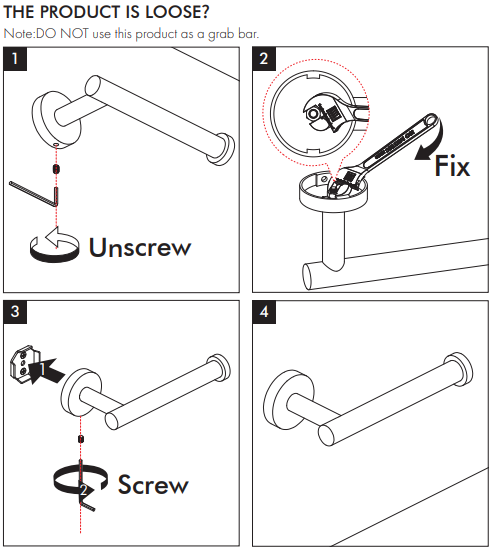
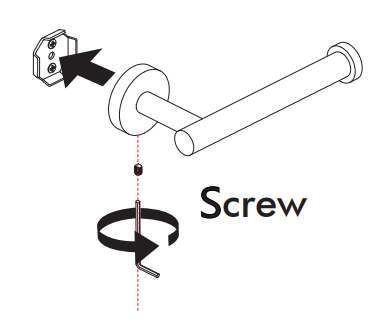
| Cartridge bonnet nut loose | Tighten bonnet nut. Click For Video |
| Cartridge damaged | Contact KES for replacement |

| Cause | Remedy |
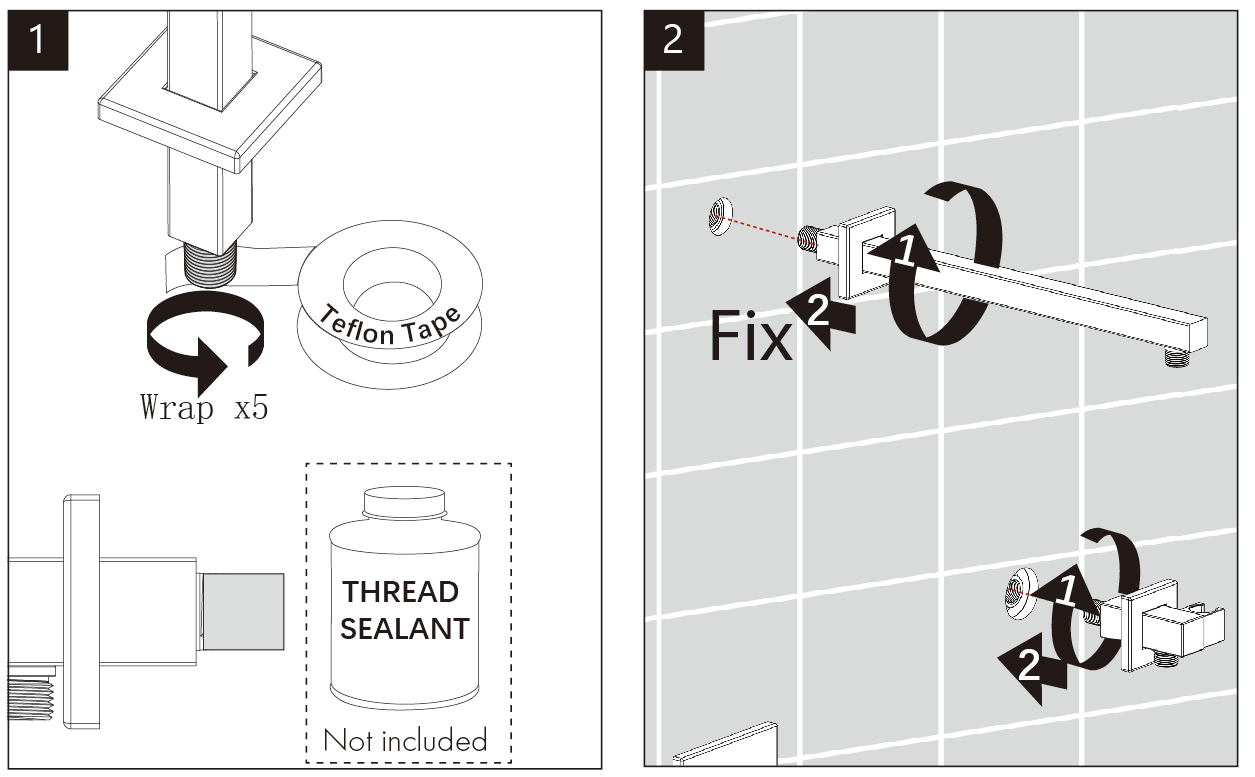
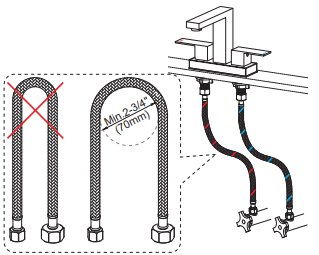
| Wrong size or damaged plumbing fittings | Double check connectors or contact KES Note: The size of plumbing fittings should be 1/2"-14 NPT |
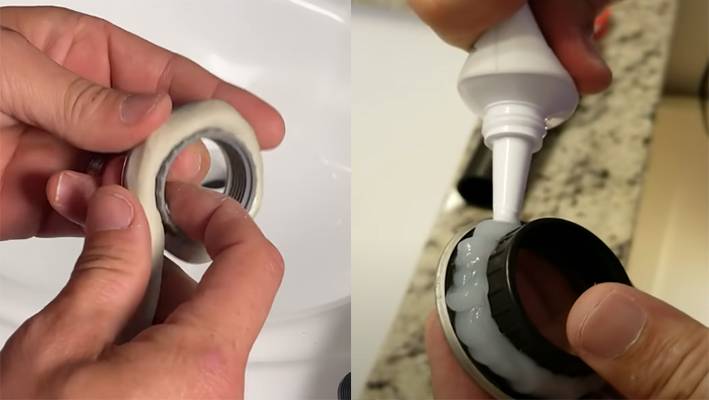
| Insufficient Teflon tape/sealant | Wrap Teflon tape around the connector 5 times and apply sealant |

| Cause | Remedy |
| Damaged | Contact KES with a photo/video for replacement |
| Insufficient Teflon tape/sealant | Wrap Teflon tape around the connector 5 times and apply sealant |
| Cause | Remedy |
| Miss filter gasket from the hose connector | Use spare filter gasket or Contact KES for replacement |
| Filter gasket worn | As above |
| Damaged | Contact KES with photo for replacement |
| Cause | Remedy |
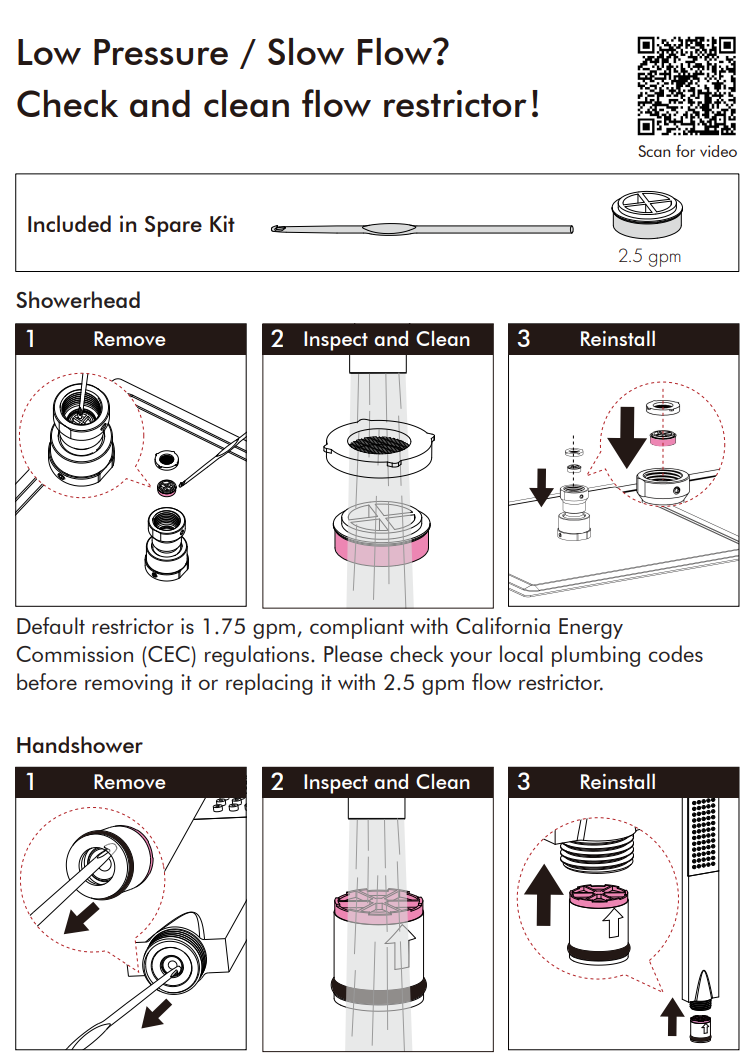
| Cartridge dirty | Remove and clean the cartridge |
| Cartridge damaged | Contact KES with video for replacement |
Please provide: Dated proof of purchase, Description of the defect/fault, Pictures or videos showing the issue(s) (optional)
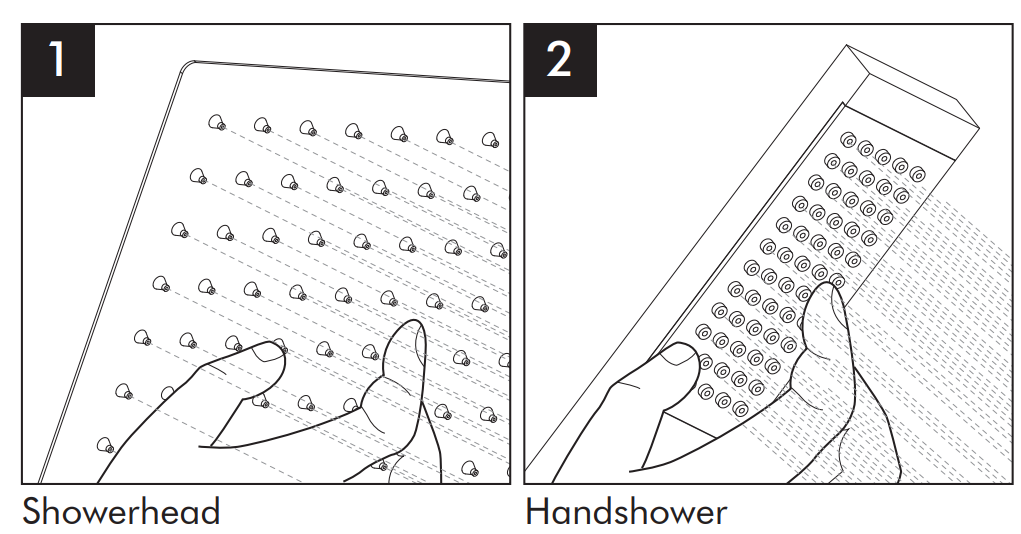
Use spare nozzles or 🔗Contact KES for replacement
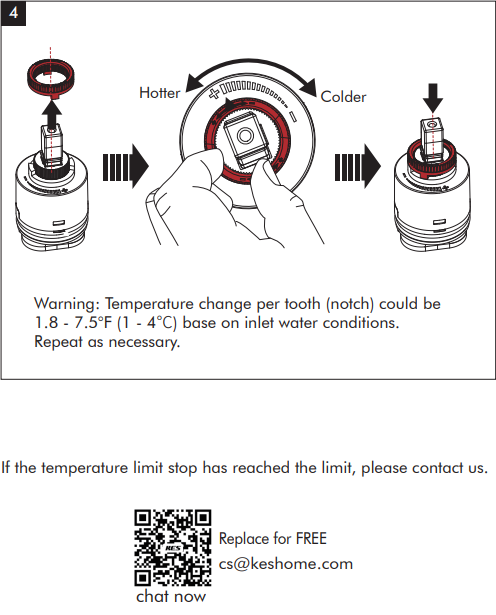
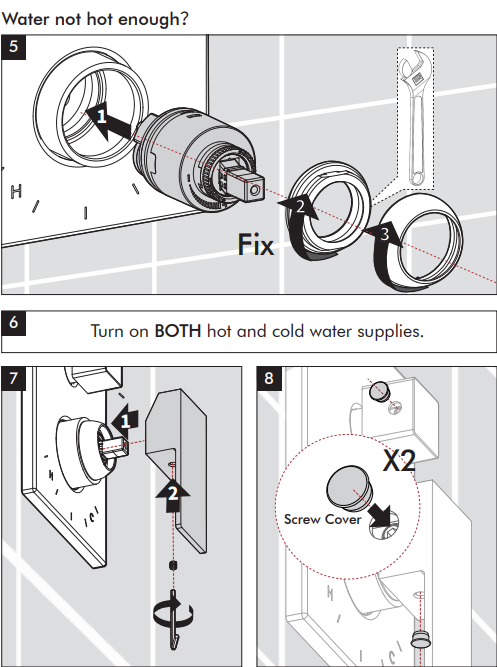
MAKE SURE COLD WATER FLOWS FROM THE VALVE FIRST. MAKE SURE WATER FLOWING FROM THE VALVE AT THE HOTTEST FLOW POSSIBLE DOES NOT EXCEED 120℉ OR THE MAXIMUM ALLOWED BY YOUR LOCAL PLUMBING CODES.
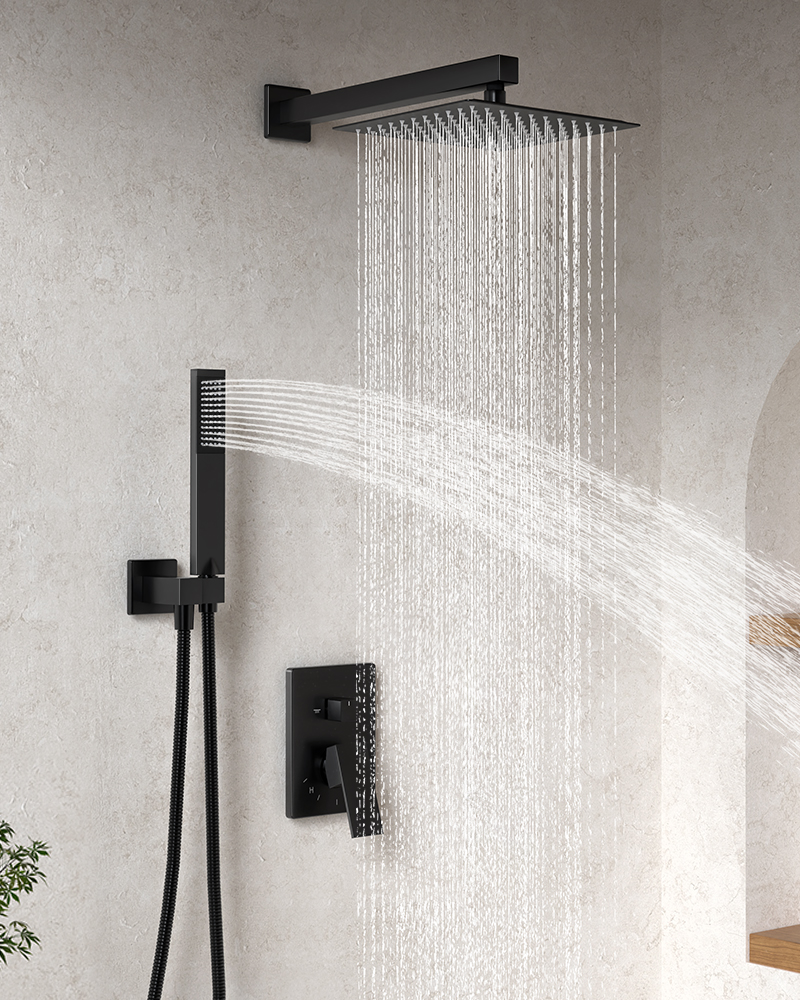
Note: By design, both showers will spray at the same time when the knob is switched between two functions.
The problem still exists or No after-sales information you need? Contact KES: [email protected] or click to Chat now!
Don't worry about unexpected challenges during projects. We've got you covered! Let us know your specific requirements, and we'll try our best to customize parts that fulfill those needs.
The problem still exists or No after-sales information you need? Contact KES: [email protected] or click to Chat now
| Cause | Remedy |
| Cartridge nut loose | Tighten cartridge nut. Click For Video |
| Cartridge damaged | Contact KES for replacement |
| Cause | Remedy |
| Spout damaged | Contact KES for replacement |
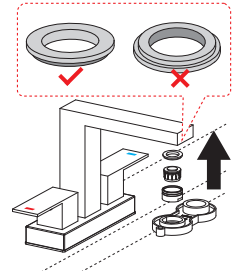
| Cause | Remedy |
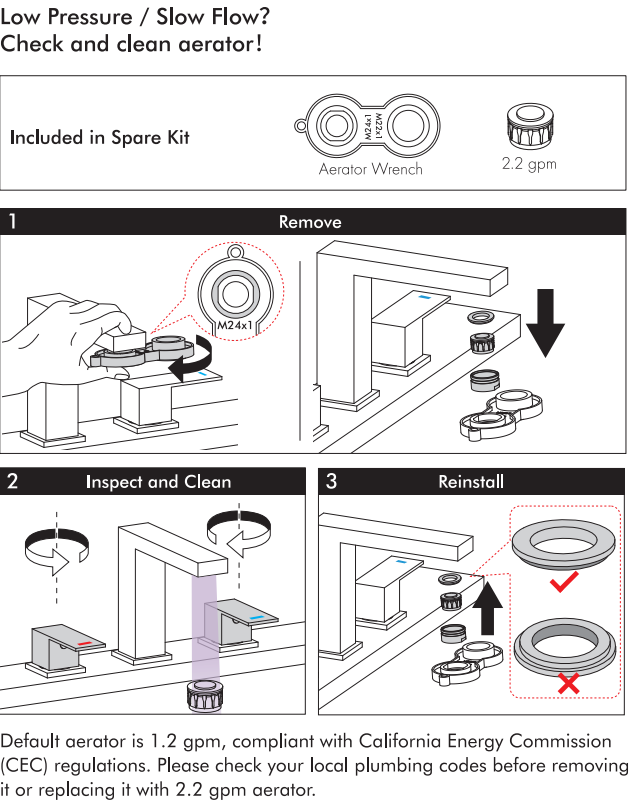
| Aerator gasket installed improperly | Reinstall aerator |
| Gasket lost | Use spare gasket or Contact KES for replacement |
| Gasket aging/damaged | As above |
| Cause | Remedy |
| Centerbody damaged | Click For Videoto check.Contact KES for replacement |
| Supply hose/ Joint of quick connect hose damaged | As above |

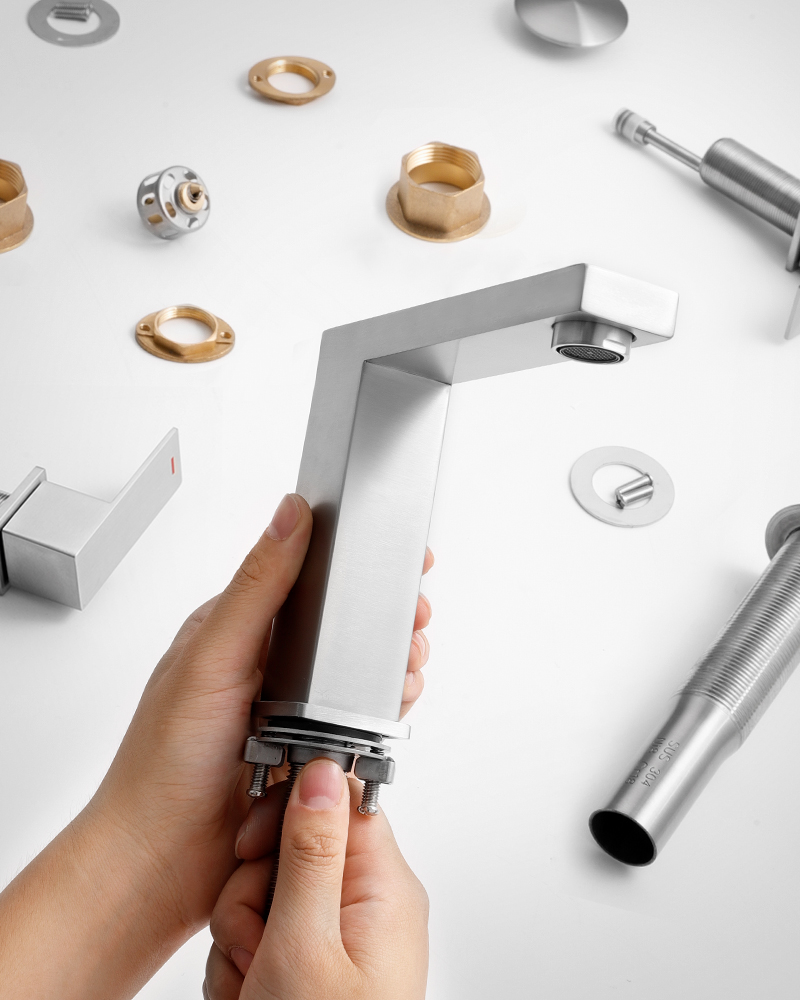
Notes Before Installation
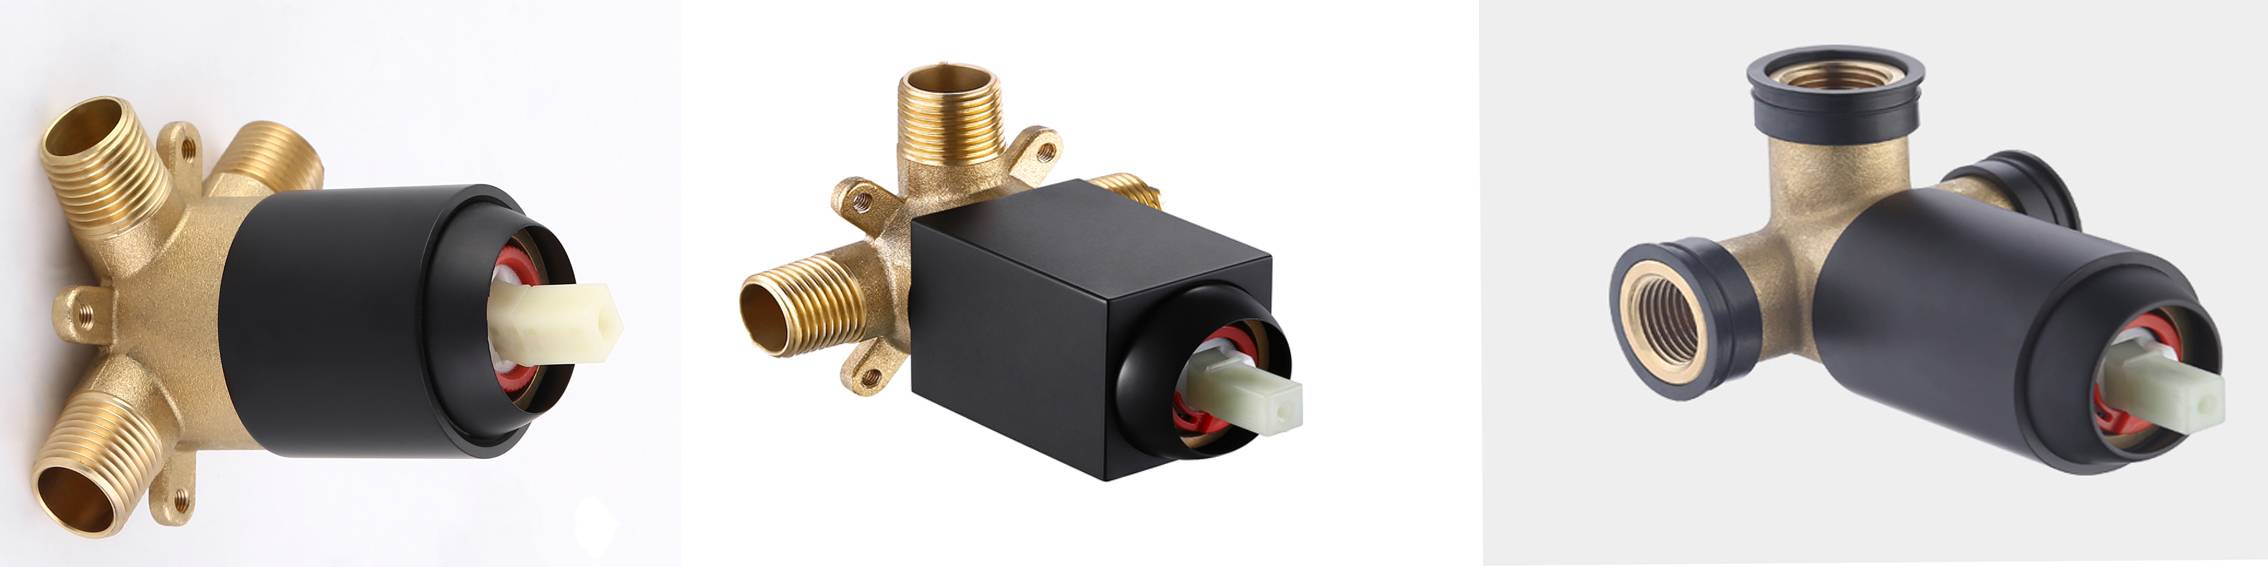
Use model L4350 as a demonstration
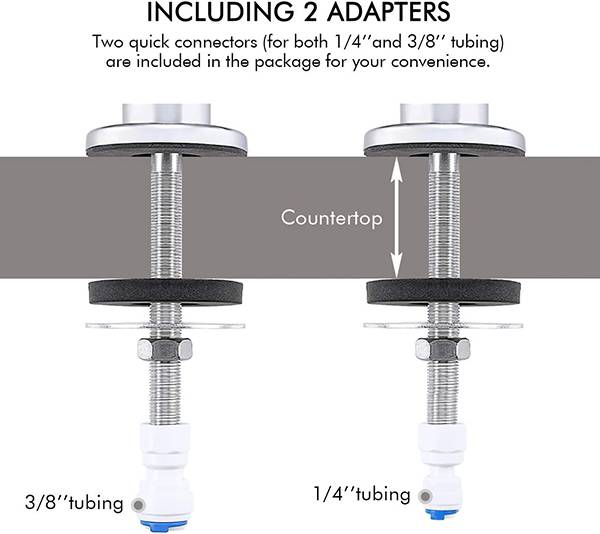
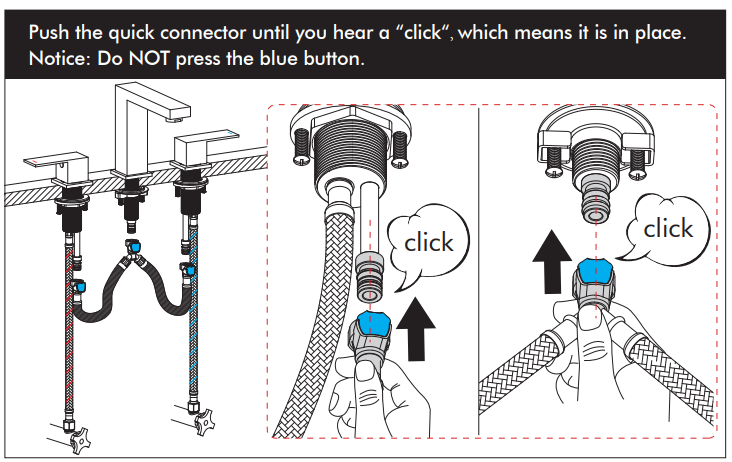
For model Z504,KES supply two quick connectors(Size:1/4''&3/8'')

* Do not use a wrench as it may cause damage to the quick connector.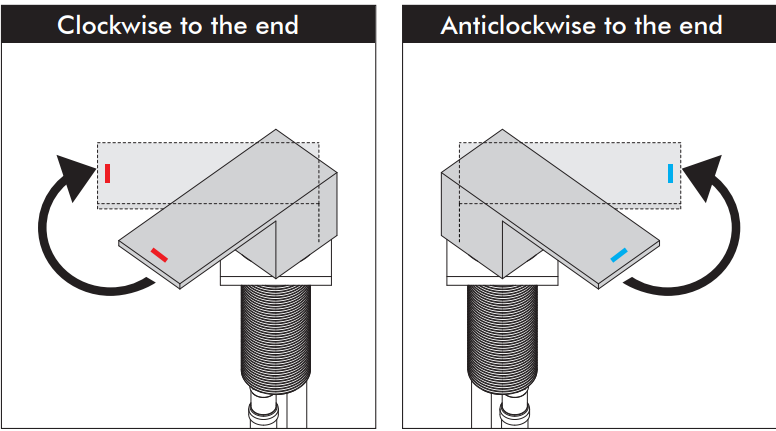
| Applicable model | Click for video |
| Handle adjustment for L4317 | mh5_J72AOaw |
| How to adjust the wrong handle direction for L4317 | PyTrktQeUq8 |
| Handle adjustment for L4350 | duXhUgvjKR0 |
 Example
| With Basket | Adjust the hanging basket to see if it works. |
| Without Basket |
🔗 Contact KES for replacement. |
 Remove the pop-up cap of the drain as the picture shows. Check if there's any blockage in the drainage pipe and clean it.
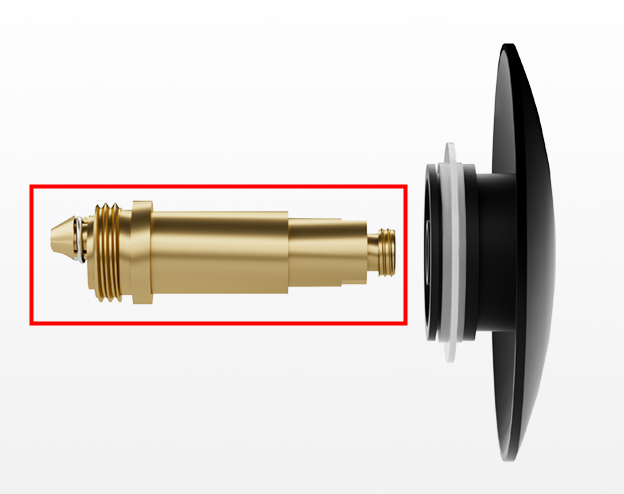
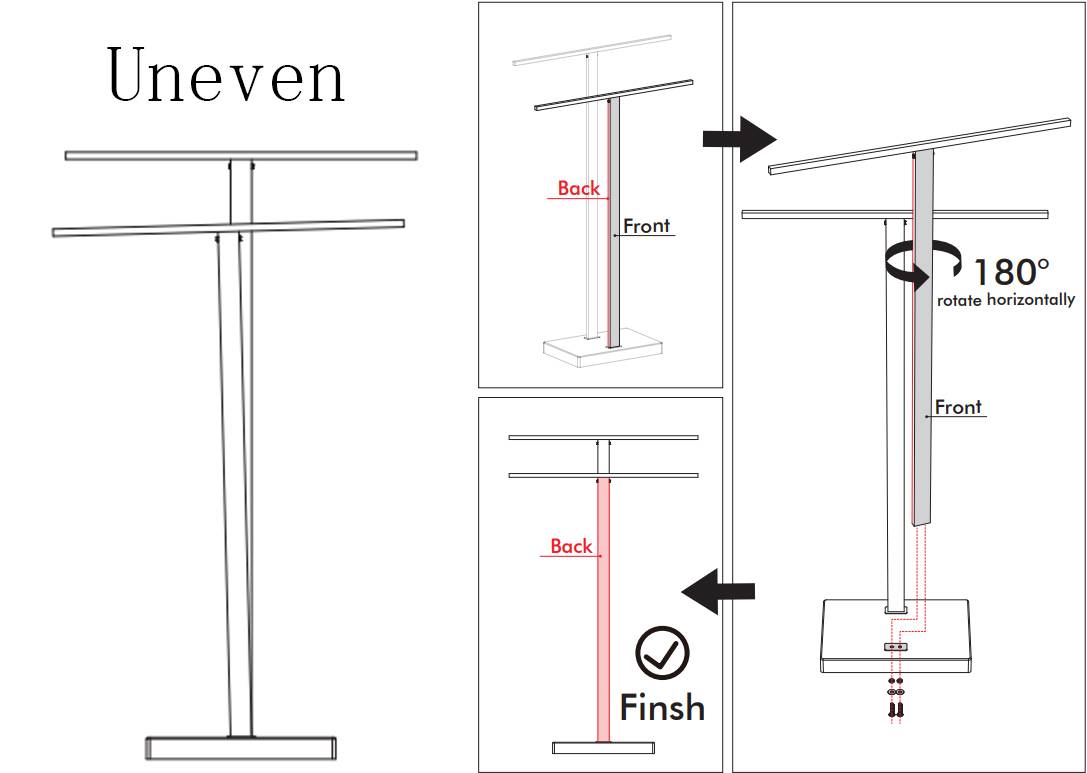
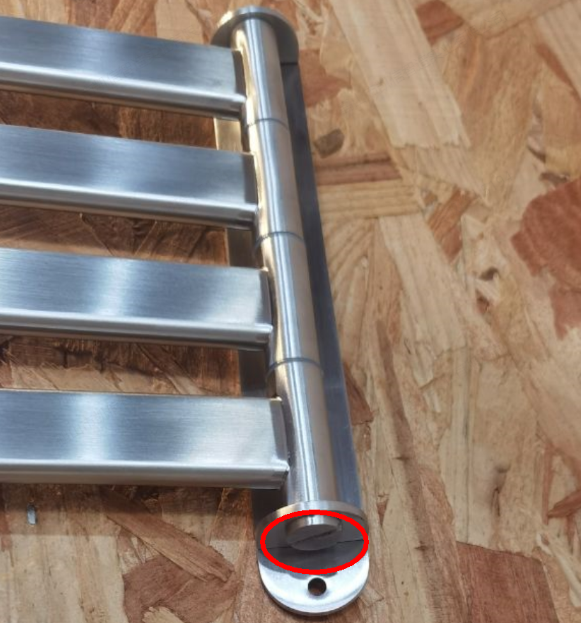
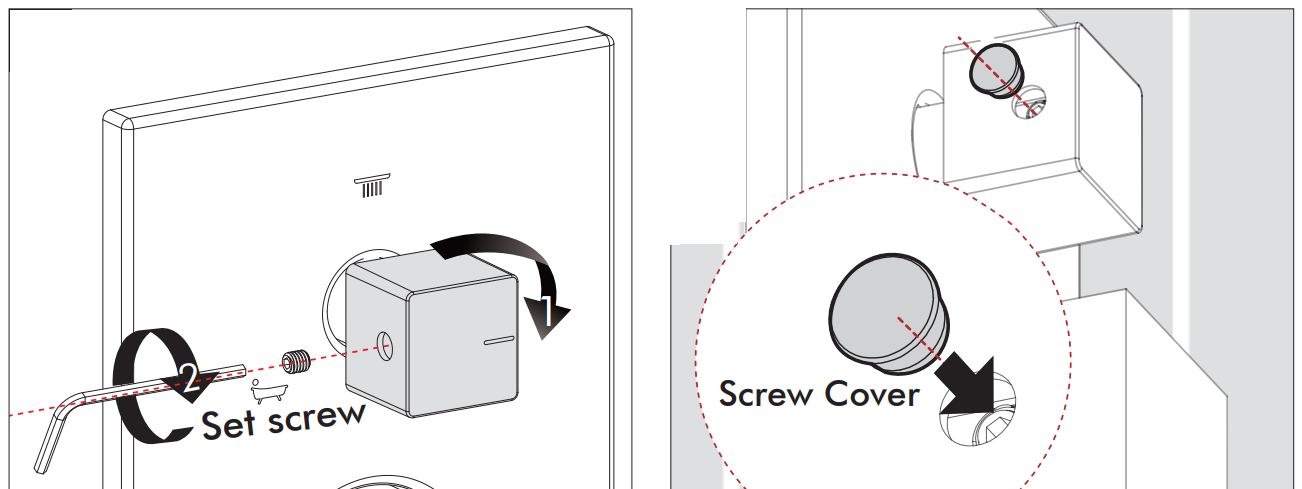
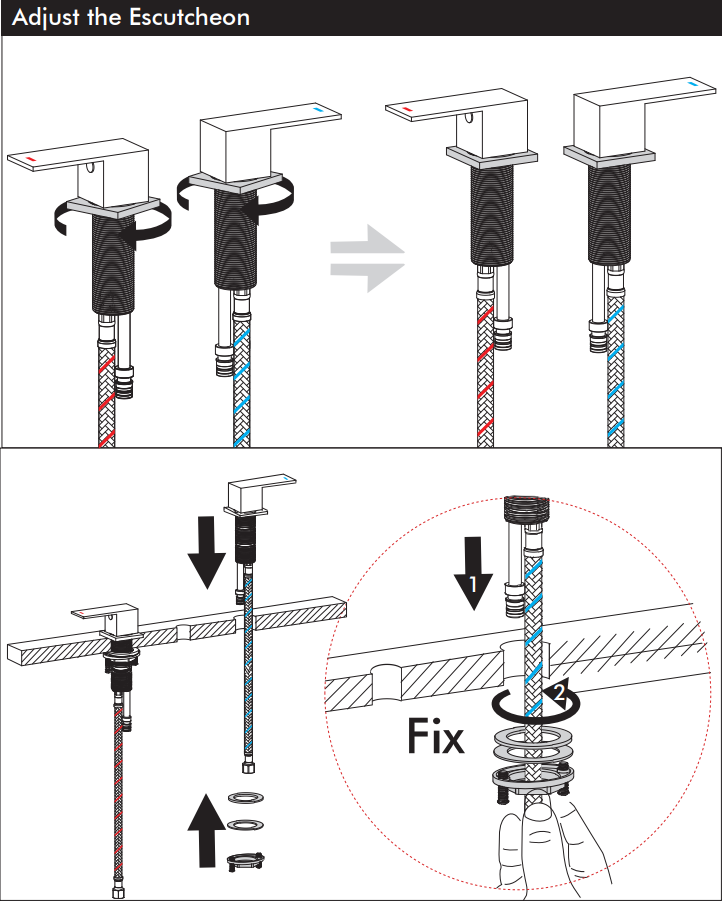
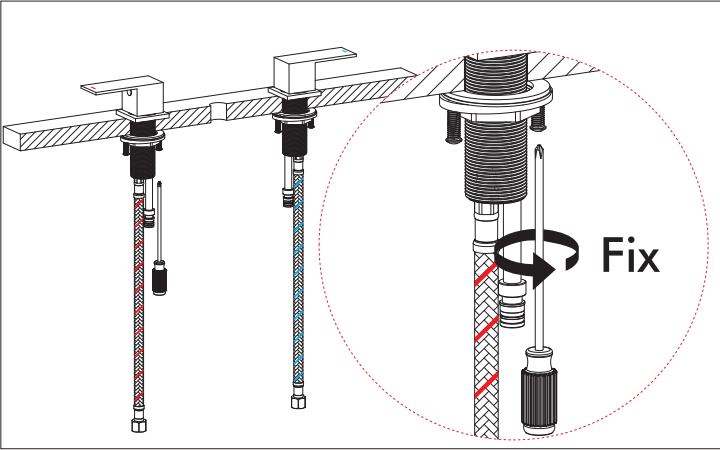
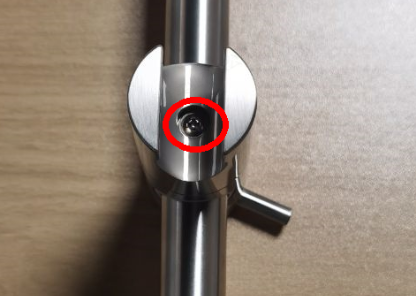
Follow these steps to check and adjust
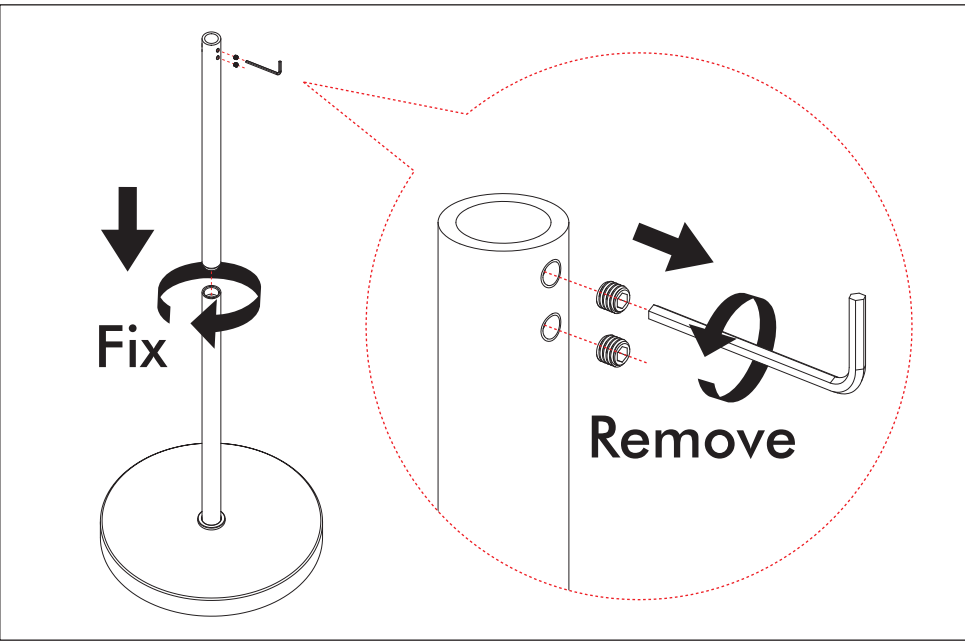
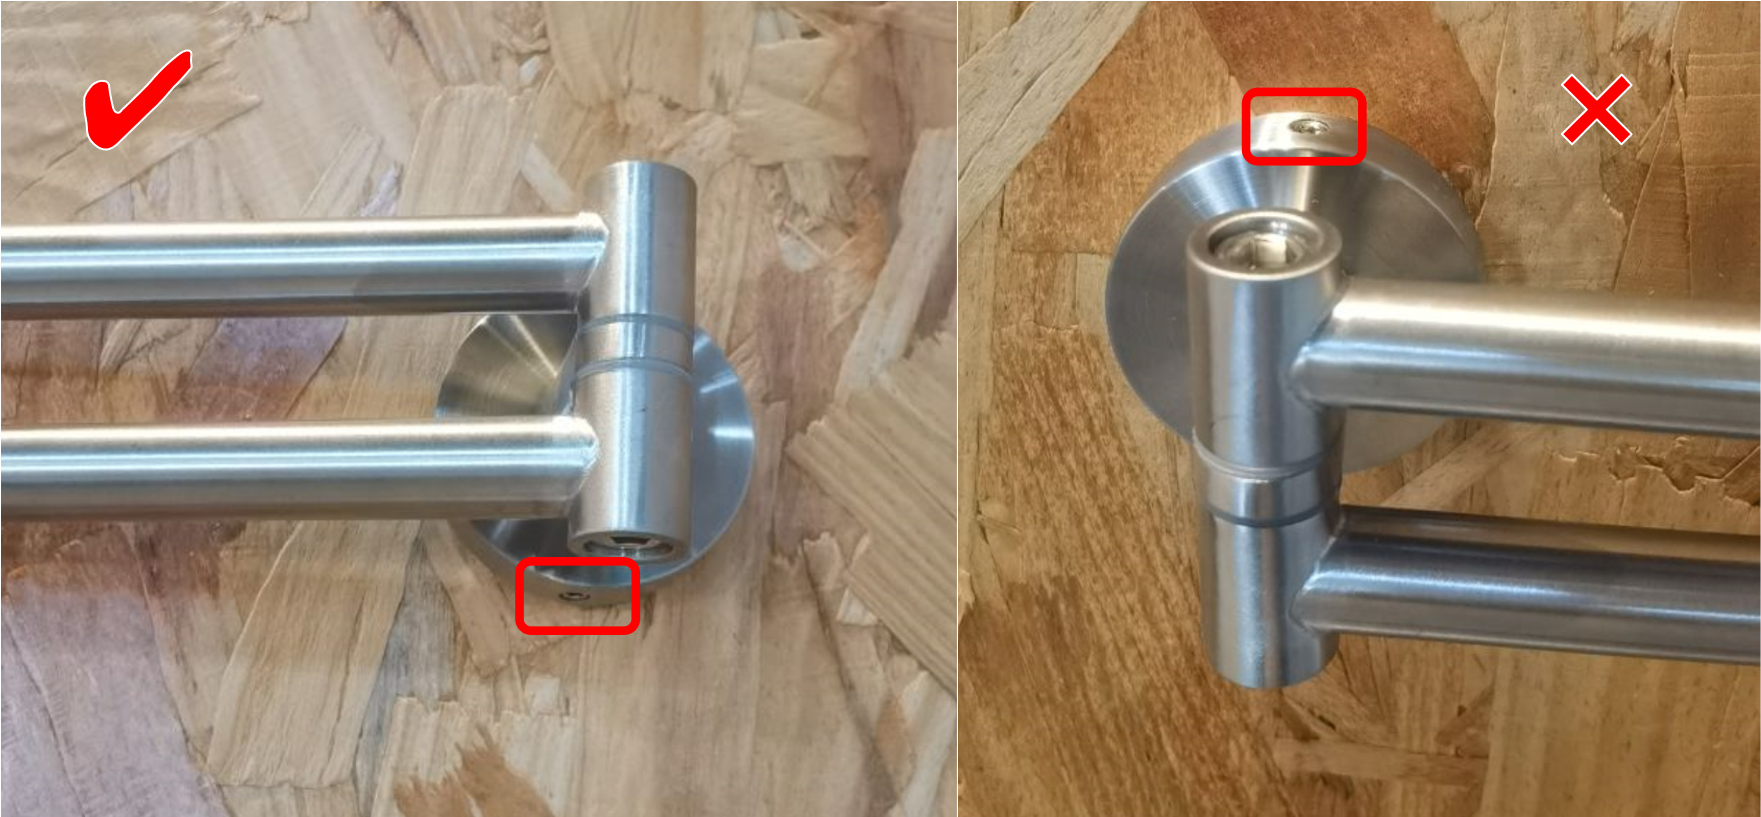
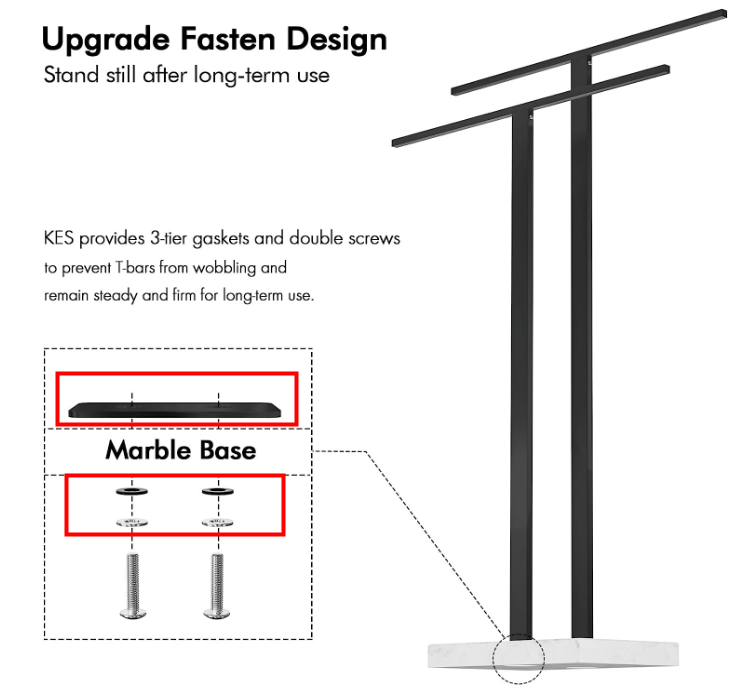
Ensure that the base screw aligns with the recess, and that the recess is located directly below.If not, adjust as picture.
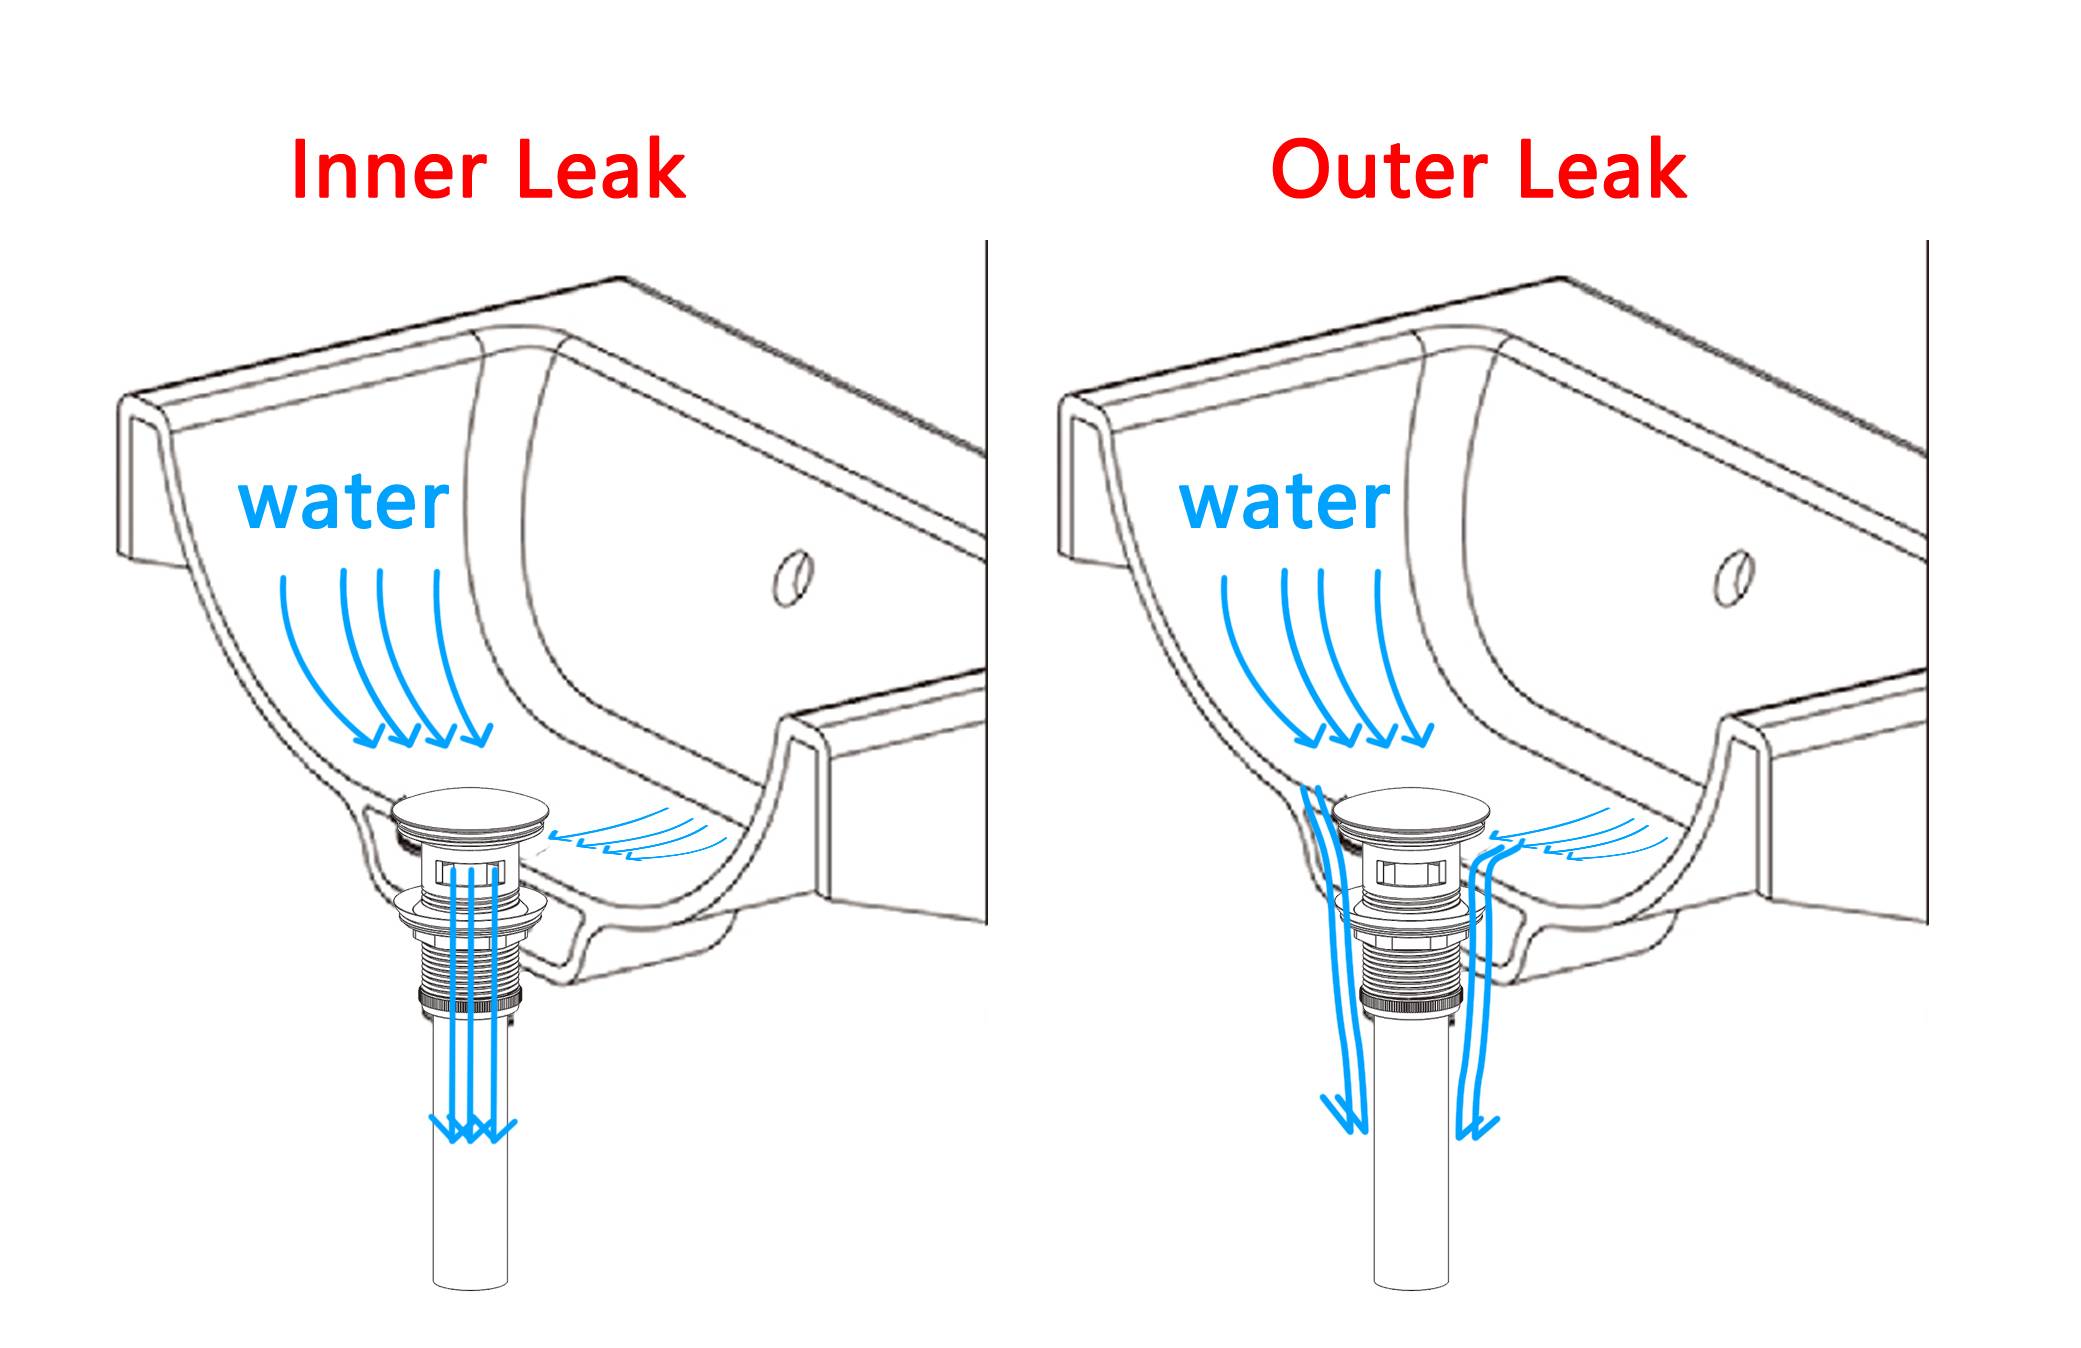
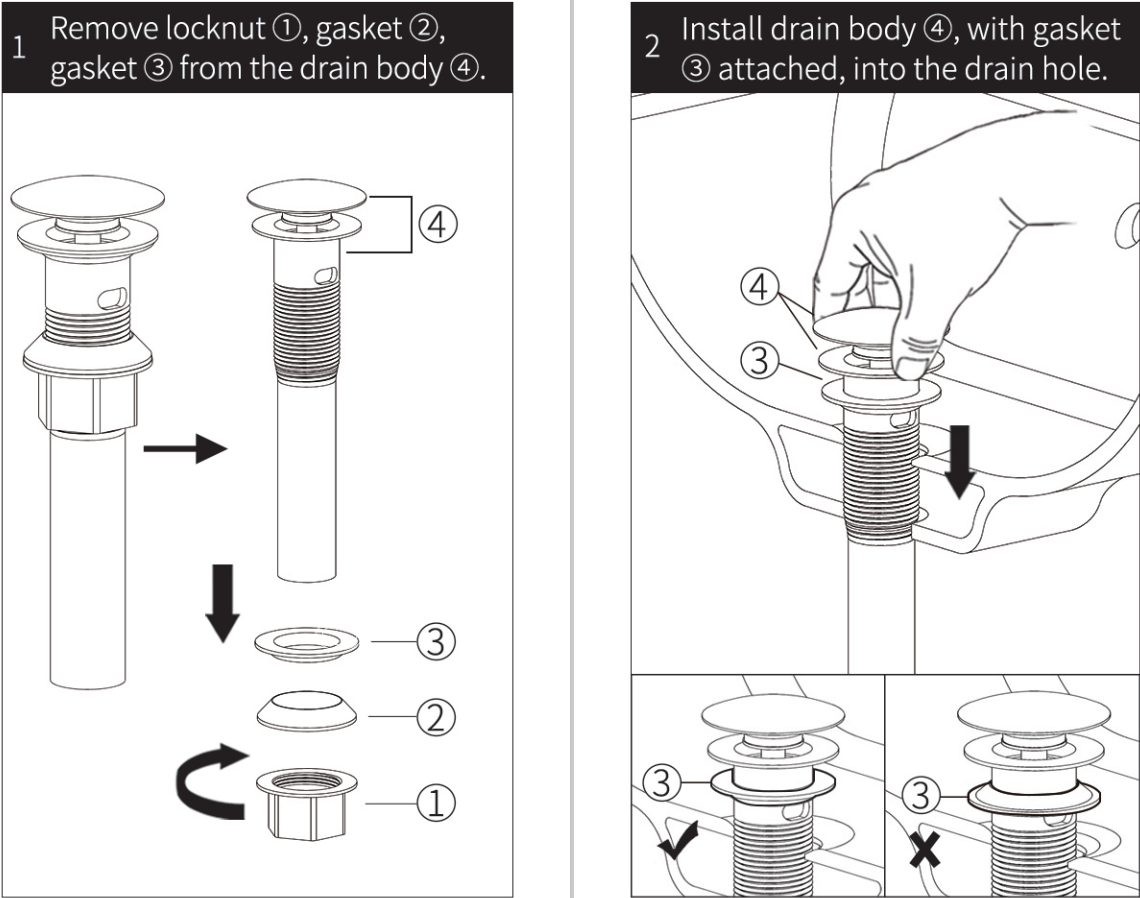
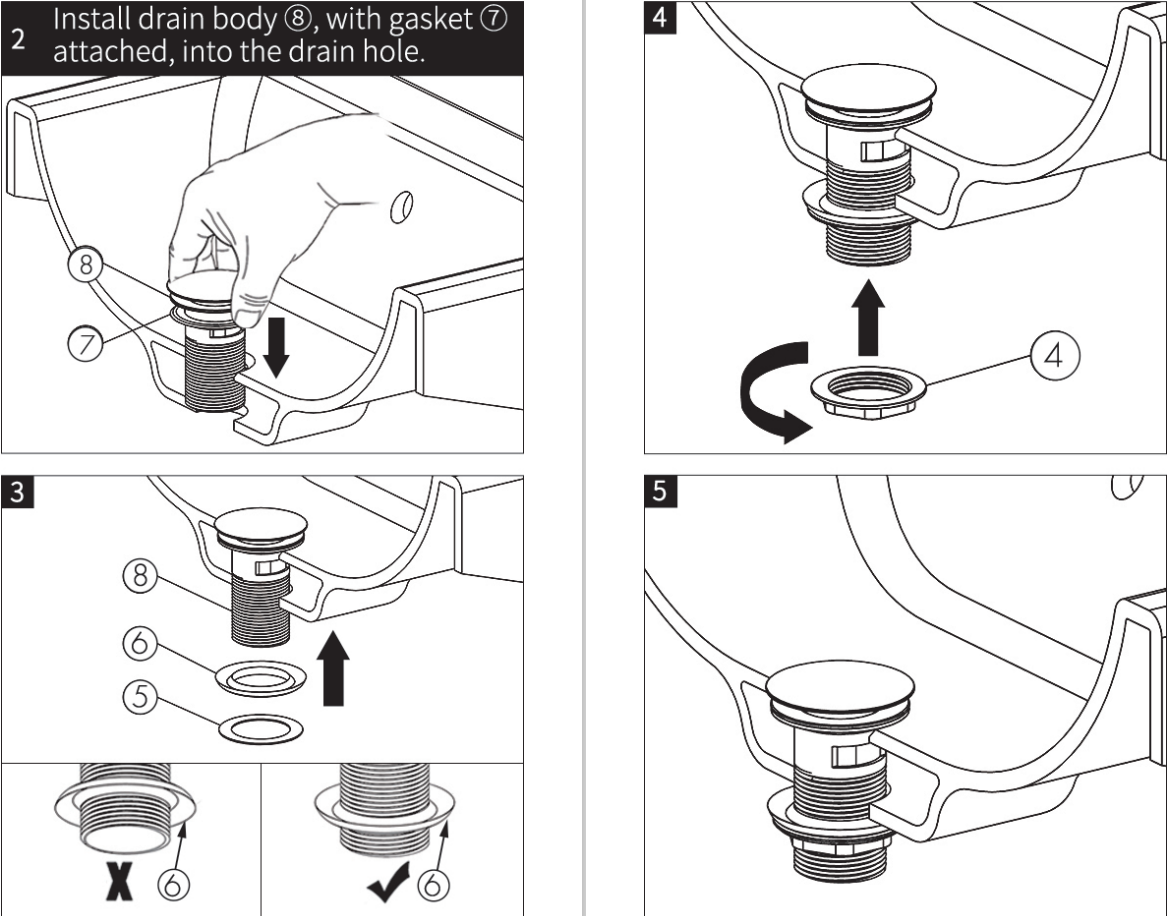
- Please confirm if all the gaskets on the diagram have been installed in place
- Gaskets missing? Do not worry, Contact KES for replacement!

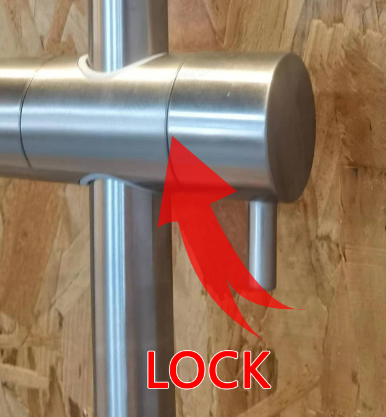
Follow the steps below to remove:
BGS201
The recommended distance between the mounting plates and the wall corner is 4-5" (100 mm-125 mm), which can ensure the optimal performance and safety of our product.

A2022
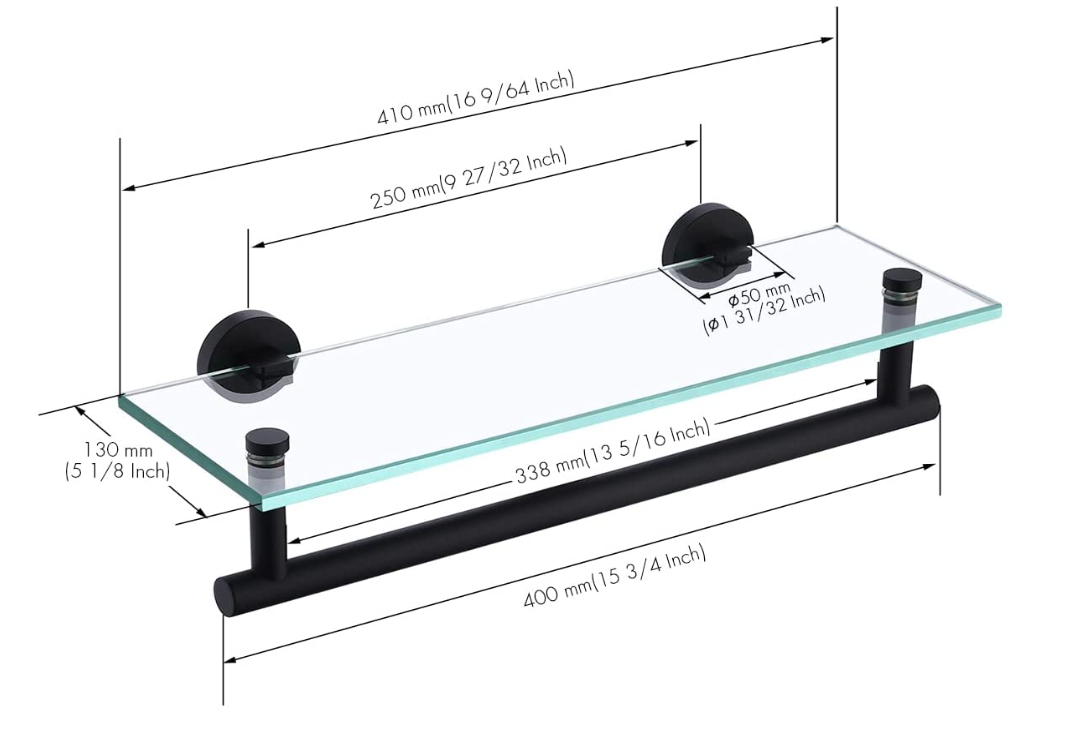
To ensure product stability, the recommended distance between the centers of the two bases is 250mm (9 27/32 inches).
The brackets are designed with elasticity. Please snug the brackets fit against the wall and secure them with screws.
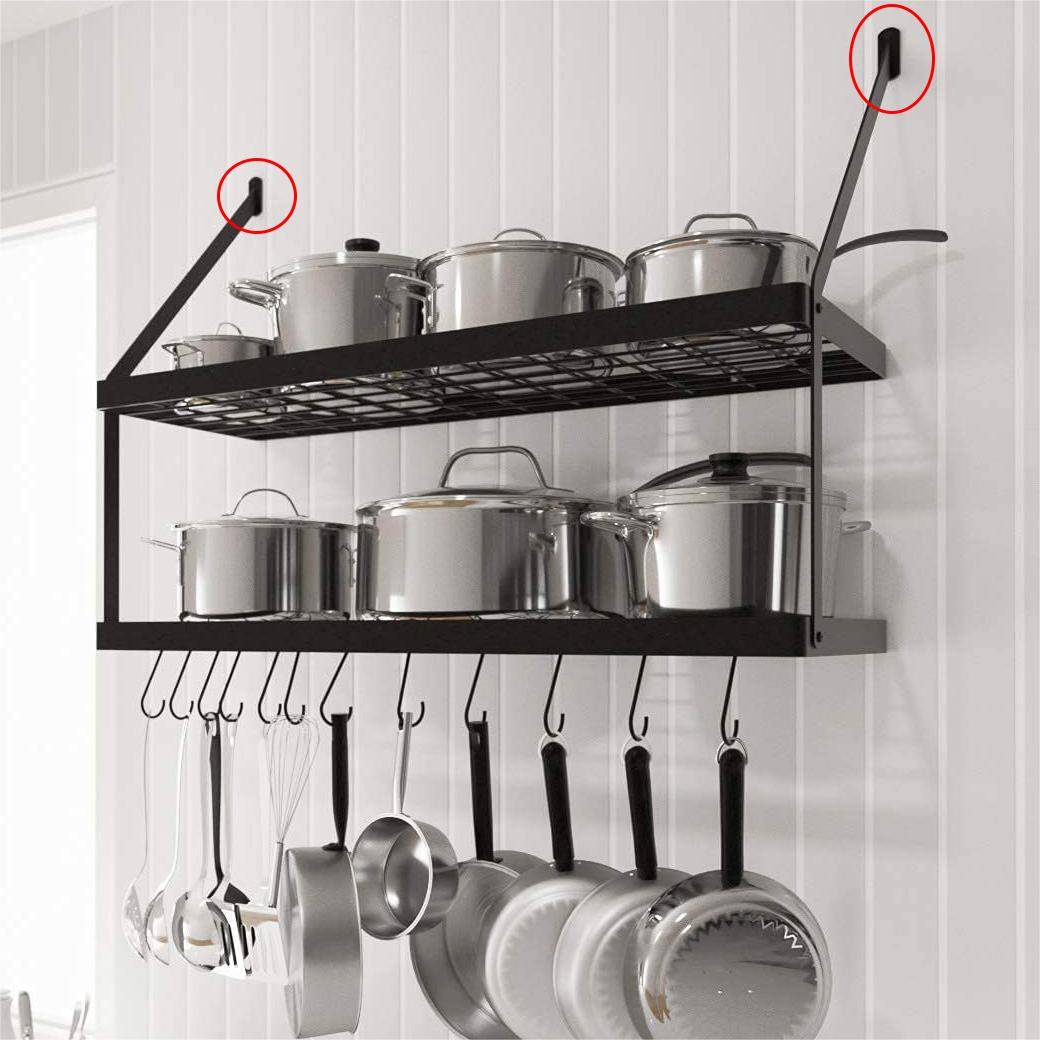
The vertical rod is actually divided into front and rear parts. Try flipping the misaligned vertical rod 180° according to the picture, and then reinstall it.